WooPack for Beaver Builder
$69.00 Original price was: $69.00.$4.49Current price is: $4.49.
- Very cheap price & Original product !
- We Purchase And Download From Original Authors
- You’ll Receive Untouched And Unmodified Files
- 100% Clean Files & Free From Virus
- Unlimited Domain Usage
- Free New Version
- License : GPL
- Product Version : 1.5.6
Last updated on : August 11th, 2024
DOWNLOAD NOW!
This and 3000+ plugins and themes can be downloaded as a premium member for only $15. Join The Club Now!WooPack for Beaver Builder: A Comprehensive Guide
WooPack for Beaver Builder is a powerful add-on designed to integrate WooCommerce seamlessly with Beaver Builder, enhancing your eCommerce site’s design and functionality. This plugin provides additional modules and customization options to create a visually stunning and fully functional online store. This guide will explore WooPack’s key features, installation process, and best practices for maximizing its potential.
Overview of WooPack for Beaver Builder
WooPack extends Beaver Builder’s capabilities by offering specialized modules and features tailored for WooCommerce, enabling users to build sophisticated eCommerce sites with ease. It enhances the design and layout options available for WooCommerce product pages, shop pages, and other key areas of your online store.
Key Features of WooPack for Beaver Builder
1. Enhanced WooCommerce Modules
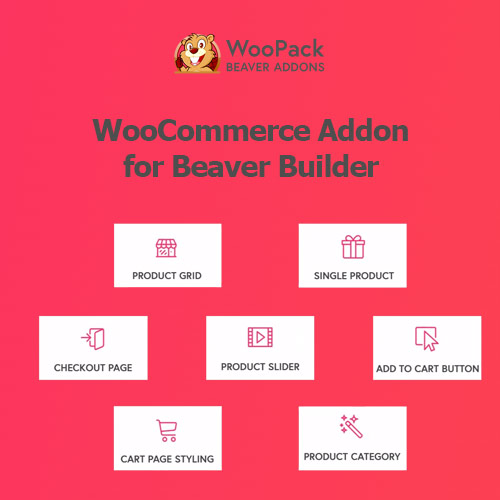
- Product Grid: Display products in a customizable grid layout, with options to filter by category, price, and other attributes.
- Product Carousel: Create dynamic carousels showcasing featured products, bestsellers, or new arrivals with smooth scrolling effects.
- Product Categories: Design attractive category displays that help users easily navigate through different product sections.
- Product Tabs: Add tabs to product pages for detailed descriptions, reviews, and related products, improving user experience.
2. Customizable Product Pages
- Product Layouts: Customize product page layouts with various modules, allowing you to highlight key product information and images effectively.
- Product Widgets: Integrate widgets for features like related products, upsells, and cross-sells to increase average order value and enhance the shopping experience.
- Review Modules: Display customer reviews and ratings in a visually appealing format, fostering trust and encouraging purchases.
3. Advanced Design Controls
- Responsive Design: Ensure your eCommerce site looks great on all devices with built-in responsive design options.
- Styling Options: Customize colors, fonts, spacing, and other design elements for WooCommerce modules to match your site’s branding.
- Custom CSS: Add custom CSS for advanced styling and tweaks that go beyond the default design options.
4. Integration with Beaver Builder
- Drag-and-Drop Editor: Utilize Beaver Builder’s drag-and-drop interface to design and customize your eCommerce pages effortlessly.
- Pre-Built Templates: Access pre-designed templates specifically for WooCommerce, enabling quick setup and customization of shop and product pages.
- Dynamic Content: Integrate dynamic WooCommerce content into Beaver Builder layouts, ensuring that product information updates automatically.
5. Performance Optimization
- Optimized Code: Benefit from performance-optimized code that ensures fast loading times and smooth user interactions.
- SEO-Friendly: Implement SEO best practices with WooPack’s modules to improve your site’s visibility in search engines.
6. Developer-Friendly Features
- Custom Widgets and Shortcodes: Utilize custom widgets and shortcodes for additional flexibility in content presentation and layout.
- API Integration: Integrate with WooCommerce APIs for advanced functionality and custom features.
7. Support and Documentation
- Detailed Documentation: Access comprehensive guides and tutorials to help you make the most of WooPack’s features.
- Customer Support: Receive support for troubleshooting and assistance with setup and customization.
Installing and Setting Up WooPack for Beaver Builder
1. Purchase and Download
- Purchase: Acquire WooPack for Beaver Builder from the relevant source or the developer’s website.
- Download: Download the plugin ZIP file from your account dashboard or purchase confirmation email.
2. Install the Plugin
- Log in to WordPress Dashboard: Navigate to Plugins > Add New.
- Upload Plugin: Click Upload Plugin and select the ZIP file you downloaded. Click Install Now.
- Activate Plugin: After installation, click Activate to enable WooPack on your site.
3. Configure Basic Settings
- Access Settings: Go to WooPack > Settings to configure basic options.
- Activate License: Enter your license key to enable premium features and updates.
- Customize Options: Adjust settings such as module visibility and default styling according to your needs.
4. Design with Beaver Builder
- Create a New Page or Post: Go to Pages > Add New or Posts > Add New and click Launch Beaver Builder.
- Add WooCommerce Modules: In the Beaver Builder editor, locate WooPack modules in the sidebar.
- Drag-and-Drop: Drag and drop WooPack modules onto your page and use the design options to customize their appearance and layout.
Best Practices for Using WooPack for Beaver Builder
1. Plan Your eCommerce Design
Before using WooPack, plan your eCommerce site’s layout and design. Consider how you will use WooPack’s modules and Beaver Builder’s tools to achieve your goals.
2. Utilize Pre-Built Templates
Make use of pre-designed templates and layouts to speed up your setup process and ensure a professional appearance. Customize these templates to match your branding and product offerings.
3. Optimize for Performance
Ensure your site performs well by using WooPack’s lightweight code and optimizing images and other assets. Regularly monitor and improve site speed and performance.
4. Test Responsiveness
Check that your eCommerce site is responsive and looks great on various devices and screen sizes. Make necessary adjustments to enhance the user experience on all platforms.
5. Keep the Plugin Updated
Regularly update WooPack to access new features, improvements, and security patches. This helps ensure compatibility with the latest versions of WordPress and WooCommerce.
6. Customize with CSS and Shortcodes
For advanced customizations, use custom CSS and shortcodes to tailor WooPack’s modules and design elements to your specific needs.
7. Explore Developer Options
If you have development skills, explore WooPack’s API and other developer tools to create advanced features and integrations for your eCommerce site.
Troubleshooting Common Issues
1. Plugin Conflicts
If you experience issues with WooPack, check for conflicts with other plugins or themes. Deactivate other plugins and switch to a default theme to identify potential conflicts.
2. Module Display Issues
If WooPack modules are not displaying correctly, ensure they are enabled in the settings. Clear your site’s cache and refresh the page if needed.
3. License Activation Problems
If you have trouble activating your license, verify that you’ve entered the correct license key. Contact support if issues persist.
4. Performance Concerns
If you notice performance issues, optimize your site’s assets and review any heavy modules or design elements that may be impacting load times.
Conclusion
WooPack for Beaver Builder is a powerful add-on that enhances the functionality of Beaver Builder, offering specialized modules and features for WooCommerce integration. With its advanced design controls, performance optimization, and extensive customization options, it provides a robust framework for creating a highly effective eCommerce site.
By following the installation instructions and best practices outlined in this guide, you can effectively use WooPack to enhance your WooCommerce site and achieve your design and functionality goals. If you have any additional questions or need further assistance, feel free to ask!
Be the first to review “WooPack for Beaver Builder” Cancel reply
Related products
WooCommerce Plugins
WooCommerce Plugins
WooCommerce Plugins
WooCommerce Plugins
WooCommerce Plugins
WooCommerce Plugins
WooCommerce Plugins
WooCommerce Plugins








Reviews
There are no reviews yet.